2

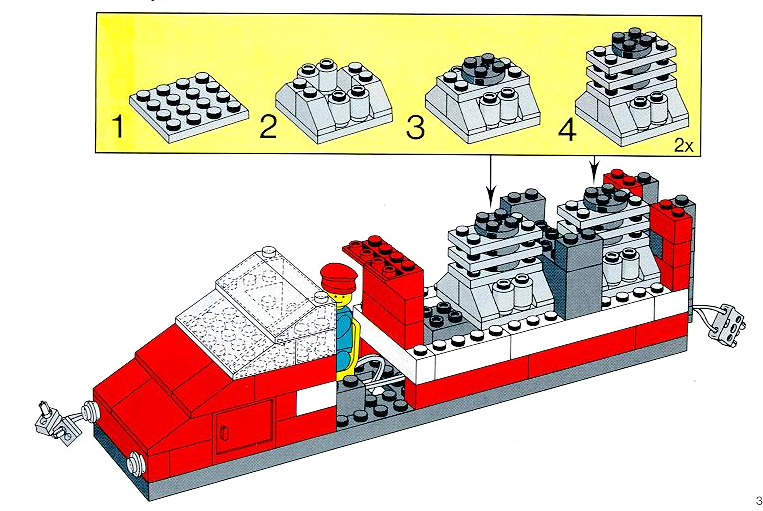
I would like to convert the High-Speed City Express Passenger Train Set 7745 from the 12V track system to the Powered-Up system.

High-Speed City Express Passenger Train Set 7745

It seems to be trivial to exchange the old wheels with the new wheels, but I am looking for good ideas on how to embed the motor with the power block in the train.

The installation of the motor should match the old design nicely and the batteries should be easy to change. Any suggestions?

2 Answers 2

3

I would suggest placing the Powered Up hub in the front vehicle, replacing the brick-built 'engines' and 12v weights.

Parts required:

  • Two 1x4 plates with two studs (no. 92593) in any colour;
  • Two 1x8 bricks (no. 3008) in white;
  • Four 1x2 bricks (no. 3004) in black.

Assuming that you are building the coach from scratch:

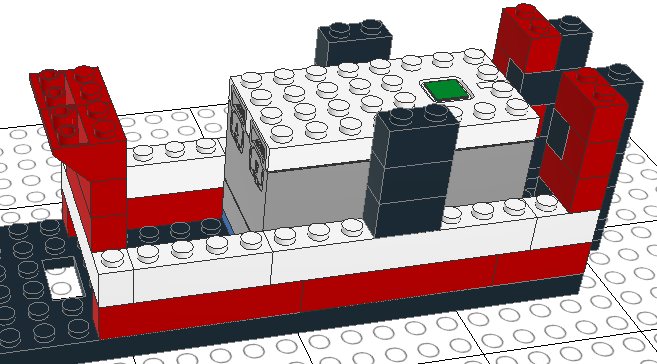
  • In step 2 of the building instructions, omit the weight brick. Instead, place the two 1x4 plates across the chassis at opposite ends of where the battery box will stand (so there will be six studs in between them).

7745 step 2 with added 1x4 plates

This not only makes it easier to remove the hub to change batteries, but lifts it clear of the pin on top of the motor.

  • In step 4, substitute 1x8 white bricks for the 2x8 white bricks.

7745 step 4 with 2x8 bricks substituted

  • In step 6, omit the second weight brick and substitute the four 1x2 bricks at each end.

7745 step 6 with 1x2 bricks substituted

  • In step 7, replace the engines with the Powered Up hub.

7745 step 7 with Powered Up hub

I believe it would be possible to convert the headlights in the same vehicle to Powered Up lighting, by replacing the 12v light brick with a 1x2 brick with two holes (part no. 32000) and mounting the Powered Up LEDs in the holes. I don't think it would be possible to have the lights at the other end of the train illuminate, as the Powered Up light cable would not be long enough to reach both sets of lights at once.

2

My first instinct would be to replace the train weights in the locomotive with the battery box:

Step 4

That will require a little reworking of the walls to be 1-wide throughout so the battery box can be included. You would unfortunately have to remove the engine details:

Step 7

These are behind shutters, so it isn't a major cosmetic issue:

Step 8

There are 9 modules of space between the rear engine and the front of that compartment, so you should be able to keep the rear engine intact if desired.

The roof on the rear of the locomotive should be easy enough to remove when you need to change the batteries. This process could be further simplified by replacing some plates with tiles and putting tiles under that battery box itself.

Step 12

Your Answer

By clicking “Post Your Answer”, you agree to our terms of service and acknowledge you have read our privacy policy.

Not the answer you're looking for? Browse other questions tagged or ask your own question.