17

All right, here's a tough one for ya'll.

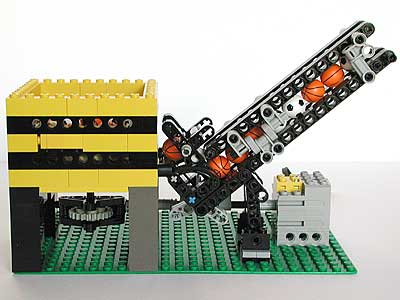
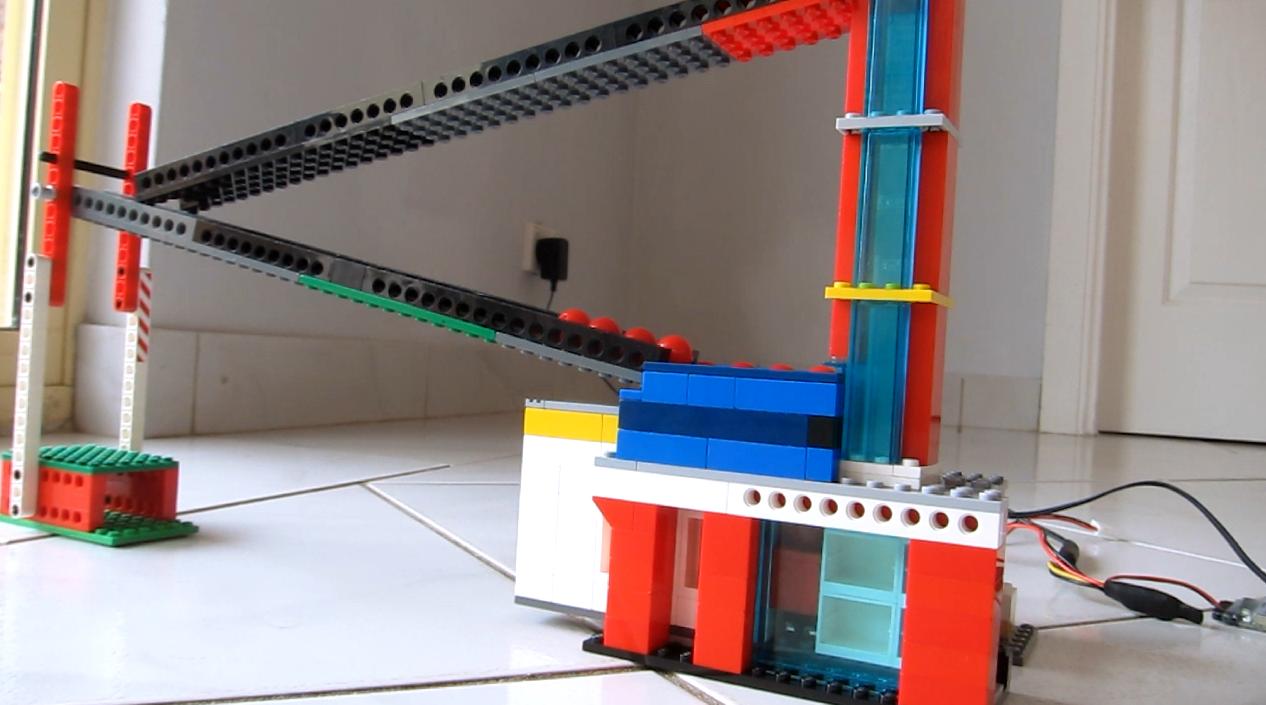
How can I built a marble pump out of LEGO bricks? What would the mechanism which pushes the marbles up need to look like?

Here's an example in this video: http://www.youtube.com/watch?v=OBb-qyXFb5E&feature=youtube_gdata_player

Unfortunately, one cannot see the mechanism which pushes the marbles upward very well. I couldn't determine what pieces he was using - I think there was a slope, but I'm not sure as to how it moves the marbles up the pipe.

3
  • 1
    It sounds like you're looking for a lift. A pump is used to displace fluids.
    – Ambo100
    Commented Nov 27, 2011 at 14:49
  • @Ambo100 Sorry if I used the wrong term - the guy in the video calls it a marble pump. If anyone can confirm that the correct term is something else, I'll be happy to change it! Commented Nov 28, 2011 at 3:06
  • 6
    GBC'ers always call that "pump". Tha main characteristic of it is that balls are pushed (pumped) through a column, so the mechanism has to support the weight of a whole column of balls. A lift usually only supports the balls it's lifting. And for all intents and purposes, a stream of balls could even be considered as a fluid.
    – Joubarc
    Commented Nov 28, 2011 at 7:50

3 Answers 3

13

A pump is one of the most classic GBC (Great Ball Contraption) modules but is indeed difficult to get right.

One of the best illustrations I know is on this site:

ball pump mechanism

Unfortunately, most of the site is in German, but the pictures are usually illustrative enough and I think it's a good source of information for ball machines in general, not only LEGO ones. The best is of course to get in touch with one GBC builder at events and ask for information. EDIT:

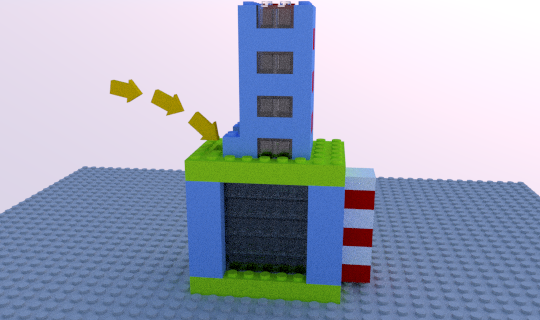
Here is a picture based on the model at aforementioned site: marble pump image

Here is a video showing the mechanism in action.

3
  • 3
    I created a short animation which demonstrates the marble pump in action and added a link to it in the answer. Commented Dec 14, 2011 at 23:57
  • @PeterDC Nice! Frankly, you could have made you own answer with that, considering the effort you put in making this.
    – Joubarc
    Commented Dec 15, 2011 at 4:57
  • @Joubarc No problem, it was the same as the design you found anyway, so I decided I would just add it onto your answer. Cheers! :) Commented Dec 15, 2011 at 14:12
5

Marbles weigh more than LEGO balls but there is a thriving community of avid "Great Ball Contraption (GBC)" builders... these move soccer balls or basketballs from their (standardized) input to their (standardized) output to the next module.

They use various techniques including stairstep, conveyor, helix, scoops, and every other motion technique imaginable.

I think looking through their designs will give you lots of ideas

This great site by Phillipe Hurbain ("Philo") should get you started, In particular, look at the Ball Pump and Jigsaw module, which have instructions included

Ball Pump GBC module by Philo Hurbain

1
  • 1
    Philo's pump is great but blocks now and then, but that's part of the GBC joy, and considering it's one of the oldest GBC modules in existence (that hasn't had parts replaced), it's actually quite resilient. By the way, if you want to see Philo or a great GBC display, I heartily recommend Fana'Briques, end of June in Rosheim (France).
    – Joubarc
    Commented Nov 28, 2011 at 7:55
3

I found this question and used Joubarc's and Peter's answer to guide my pump build: lego marble pump

The video of it's operation is here. As per Joubarc, it was very tricky to get right. Here are some subtle things I learnt/did during the build:

  • The blue down wedges in the ball feed are not symmetric horizontally. Putting them on alternate layers helps stop the 14mm beads getting jammed.
  • The ball feed needs to be narrow at the bottom (beams with a 2 stud gap, no wedges) to avoid ball jams and ensure the balls drop down with gravity into the intake.
  • Needed a gradual ramp in the slider/feed section (yellow) to prevent ball jams and ensure the balls would drop into the intake
  • Older bricks that have been nicked from drops, rough play tend to jam the slide mechanism as they brush past each other. Use newer/non nicked bricks.
  • Use longer horizontal beams in the slide mechanism and adjacent walls. Every vertical vertice is an opportunity for the slider to jam. Long horizontals reduce this.
  • Use window pieces in the slider to reduce slide contact and friction (see white slider section)
  • Needed a long slide (white section) to increase clutch power holding it on to the bottom plate. With a smaller slide section it didn't take long for it to pop off due to push/pull action from the piston.
  • a 2x1 beam with two holes was used to mount the piston. This aligned the piston just right to not jam during rotation. A single hole 2x1 beam didn't work for me.
  • Needed to bias the balls at the top of the chimney to pop them out into the race section. Did this with the mini cheese wedges mounted vertically.

Your Answer

By clicking “Post Your Answer”, you agree to our terms of service and acknowledge you have read our privacy policy.

Not the answer you're looking for? Browse other questions tagged or ask your own question.