45

I have a structure with some blocks facing in the 'normal' direction:

 nn  nn  nn  nn
|  ||  ||  ||  |   
 --  --  --  --

I would like to somehow connect a layer above this that has the blocks facing the other way so that I end up with:

 --  --  --  --
|  ||  ||  ||  |
 uu  uu  uu  uu

 nn  nn  nn  nn
|  ||  ||  ||  |   
 --  --  --  --

How can I achieve this?

3

7 Answers 7

32

It depends on how close they need to be.

The following solution works, if you're happy to have things sticking out around the join:

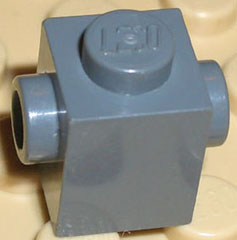
"Brick 1x2 M. 2 Holes Ø 4,87", [part:32000:7]; There's also a 1x1 brick with a hole, [part:6541:7].

Which could be used as:

Combined in desired orientation

For tighter coupling, the Minifig Wrench [part:6246d:0] can also fit over a stud, and is deeper than one stud, allowing two bricks to be inserted:

Erik Amzallag 's method

Respect goes to Erik Amzallag for this one.

I guess it comes down to how you want to hide the join - you could use tiles on the studs that stick out, which wouldn't be possible with the wrench method.

5
  • 8
    Using the wrench: Mad skills.
    – fredley
    Commented Nov 2, 2011 at 21:08
  • Yep,not my mad skills though ;) Commented Nov 2, 2011 at 21:16
  • 1
    Just note that the first technique is officially an "illegal" build as per this presentation, so Use With Caution :)
    – Phil B.
    Commented Sep 18, 2015 at 2:06
  • Indeed, however it used to be acceptable, and if I'd done it via only one stud that would be fine if a little less secure. Commented Sep 18, 2015 at 6:09
  • 1
    Just to add to the wrench idea, the same can be achieved with 11010 Minifig Ring 1 x 1 Commented Feb 15, 2019 at 5:44
22

Holger Matthes has a good page on SNOT building which includes a few techniques on how to get stud-down orientation.

Also, don't underestimate tiles, sometimes you can just lock the upside-down part into place without attaching it with studs at all (I did this when I was a kid to use a black 3943 — Cone 4 x 4 x 2 as a train chimney as the inverted part didn't exist at the time:
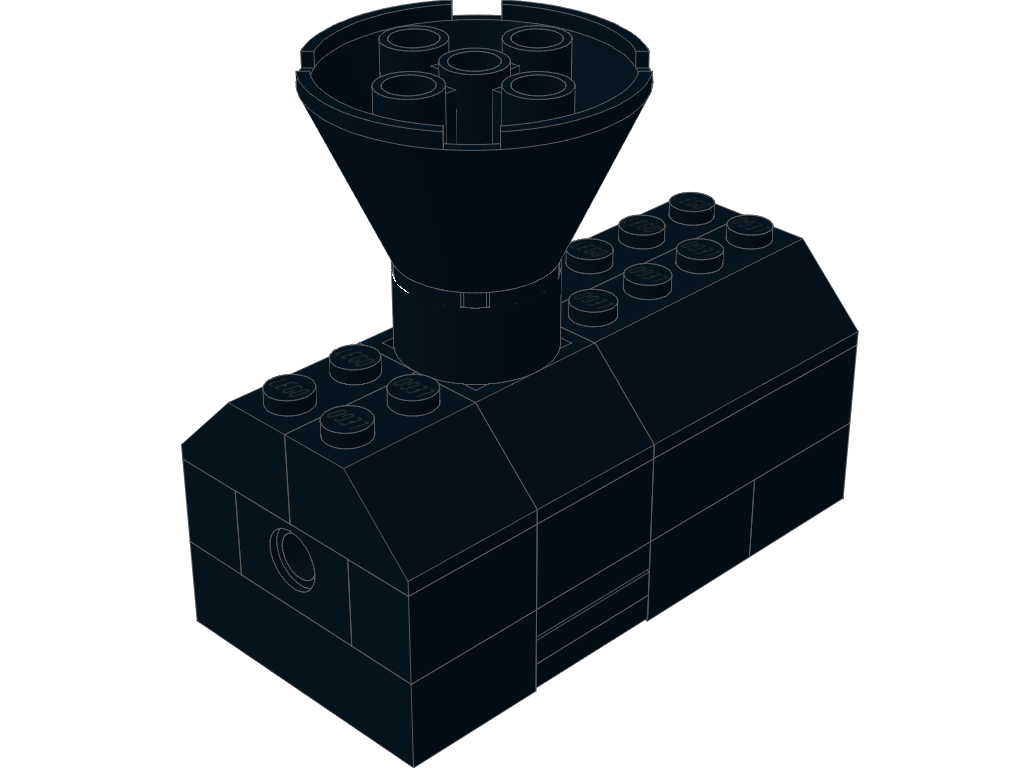
enter image description here

None of the inverted parts are actually attached, but they are locked in place by surrounding parts. You can see inverted parts in orange in this partial build; the blue parts are tiles in the usual direction:

enter image description here

Another good part to inverse stud direction is the 4081b — Plate 1 x 1 with Clip Light - Type 2 (Plate 1 x 1 with Clip Light - Type 2 as the studs are exactly one plate apart. You'll need to hide it in the construction somehow, but it can be very handy.

For example, both that part and the tile-on-tile technique are used in this window roof to inverse the below arch:
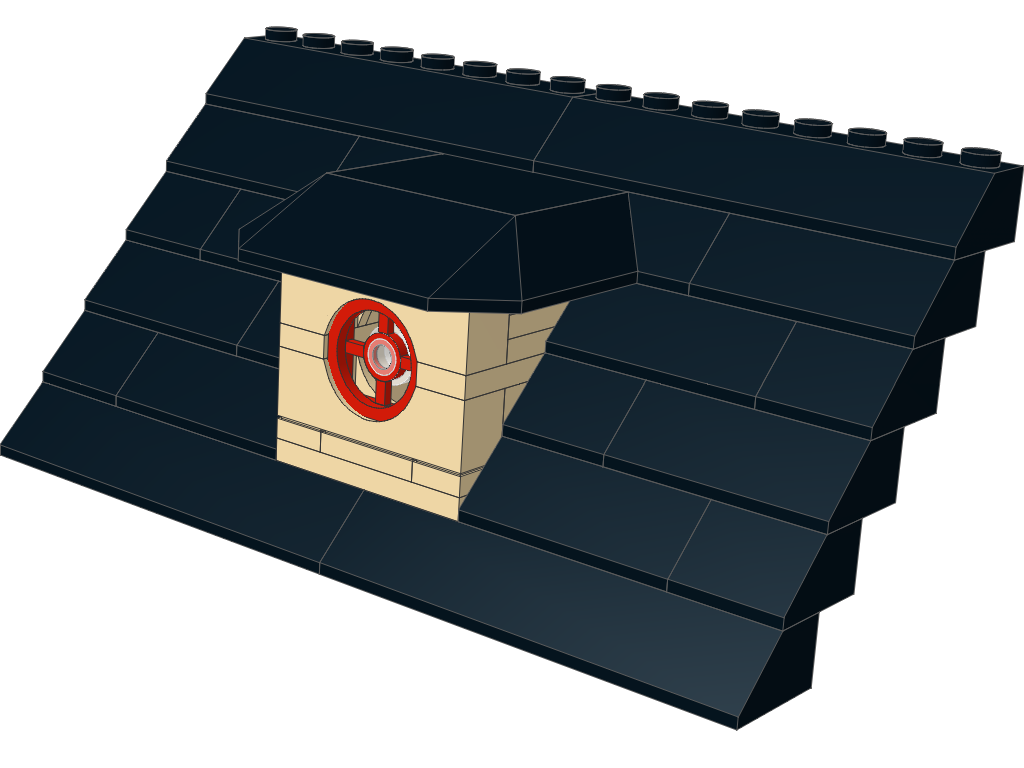
roof with window

It all rests on a tan Tile 4 x 4 with Studs on Edge, which is also used higher with a Train Roof 6 x 6 Double Slope 45 / Slope 33 to finish the roof. The following image illustrate a partial build, will all upside-down parts colored orange:
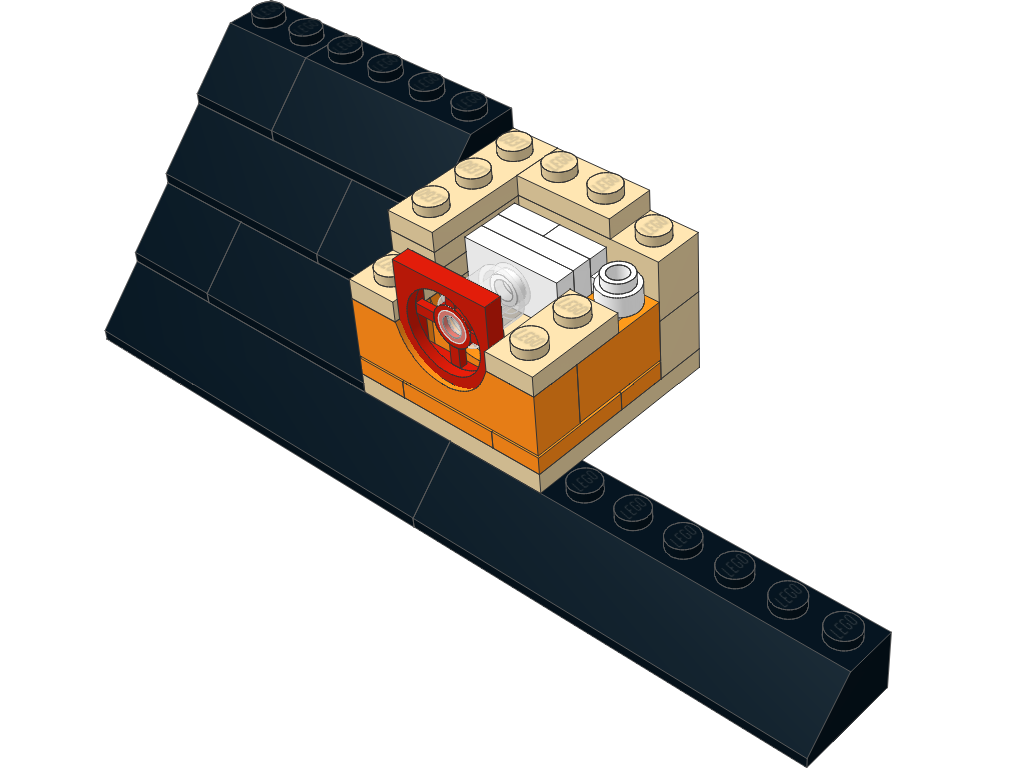
enter image description here


Edit: there are of course more techniques to be found on the Internet, but some are more simple or place-efficient than others. For plates for example, the use of levers is as compact as you'll ever find. For bricks, you can also stuff a Technic axle in the tubes, as illustrated here. Simple and efficient.


Another edit, this time answering the question with the intended stud direction.
On a 2x4 brick/plate, place a 3185 — Fence 1 x 4 x 2, then add two 87580 — Plate 2 x 2 with 1 Stud with the stud facing down in one of the empty holes of the fence. This is probably the smallest offset you'll get, but the thickness of the fence isn't really standard, so whether it's useful or not depends on the rest of your creation.

If you're willing, there's also the Clikits Bead, Ring Thick Small with Hole which accepts a stud in both directions.
3
  • 1
    Just a note on the edit - neither of those techniques would work to answer the question "How do I end up with studs together" - both the levers and axles methods result in "Studs facing out" Commented Nov 2, 2011 at 13:25
  • 3
    Right, I had stored the question in a corner of my mind where it evidently got corrupted (I need to tidy up the place sometimes). 4081b has the same isue, as a matter of fact. But most of the time it's more or less the same issue anwyay.
    – Joubarc
    Commented Nov 2, 2011 at 13:31
  • I know that feeling ;) Commented Nov 2, 2011 at 13:32
9

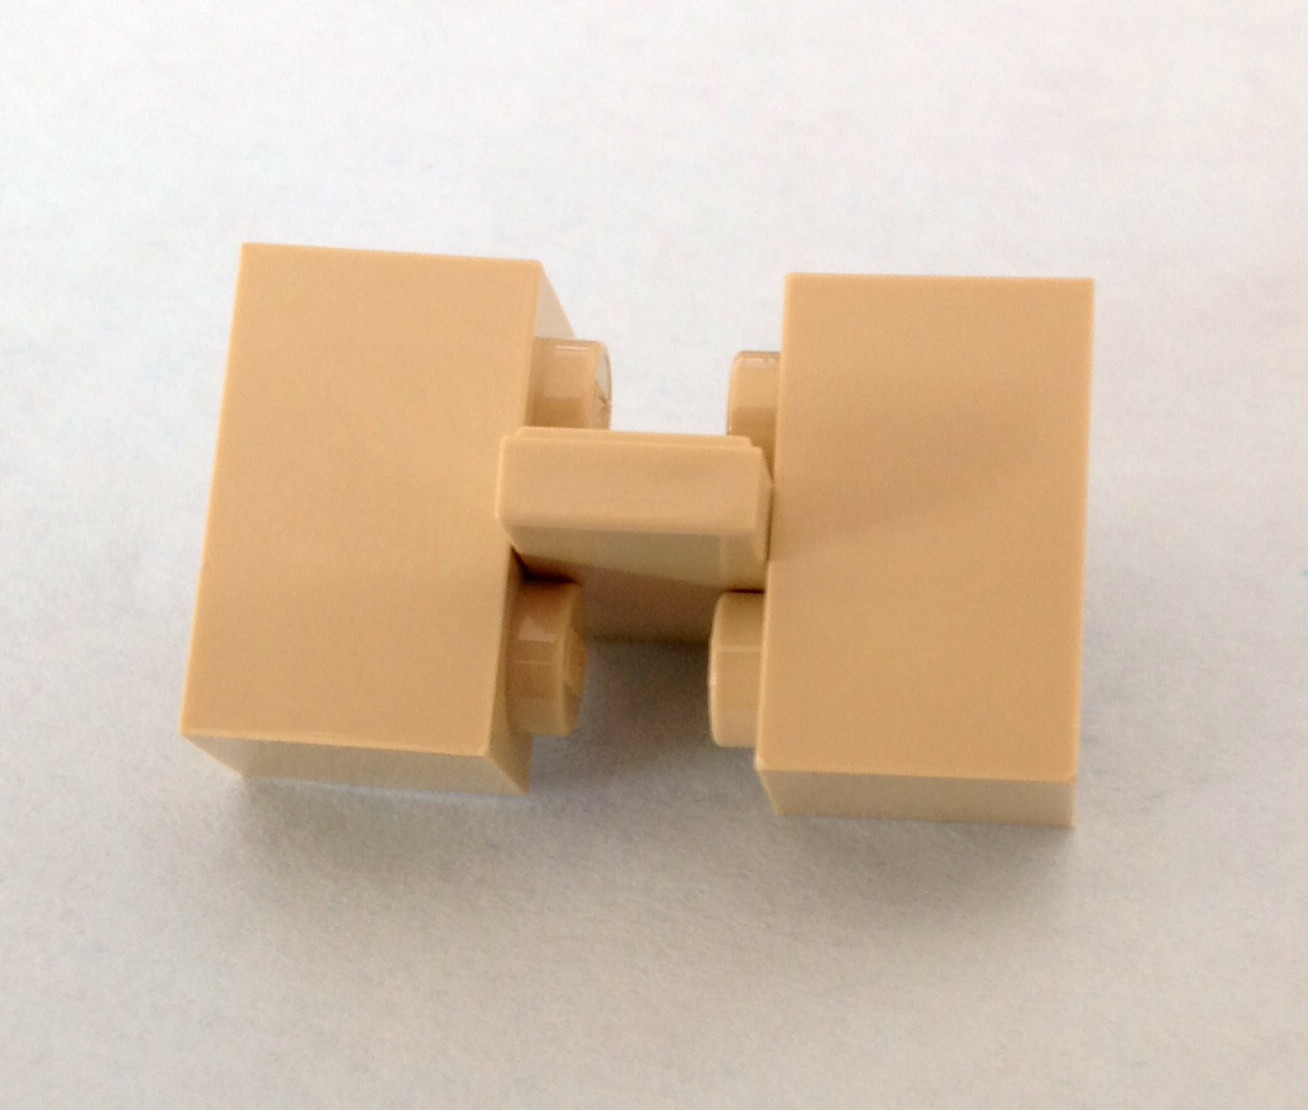
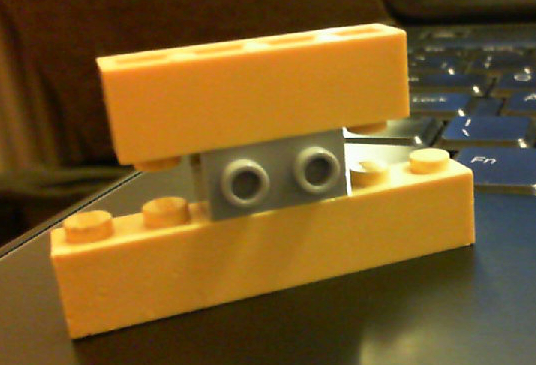
This is very old-school, but that's how I was doing SNOT in the early 80's: a plate, or a tile (as shown) snaps between 2 studs. I prefer tiles to plates, as I don't have studs-alignment issues, but I've used both, and both work.

enter image description here

6

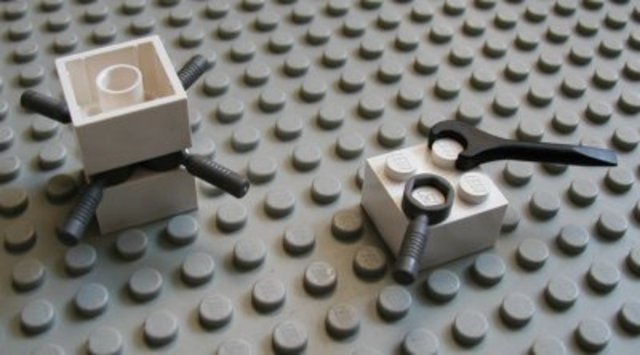
I have never found a solution that I was completely pleased with (and gluing is a no-go), but the closest I've ever come is using these.

enter image description here

0
6

Using Technic beams can work in this situation. As the holes are the diameter of a stud and are deeper than two studs' height, it can be used to some extent. See When did Lego decide that it was okay to put a stud into a technic hole? for more information on the limitations of this strategy.

4

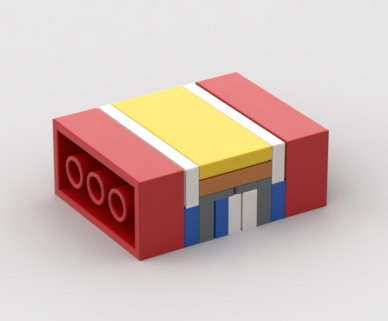
I came up with this

(6 plates / 2 bricks)

enter image description here

Blue = Plate 1 x4

Orange = Plate 2 x4

White = Tile 1 x4

Yellow = Tile 2 x 4

DkblGray = Bracket 1 x 2 - 1 x 2 Inverted

also this (2 plates thick)

enter image description here

Part# 15535 : Tile, Round 2 x 2 with Hole

and Part# 18674 : Tile, Round 2 x 2 with Open Stud

  • This one i saw somewhere else

("2.5" plates thick)

enter image description here

Part# 18654 : Technic, Pin Connector Round 2/3 L

1
  • 1
    Great answer. I would probably also add the height/thickness of the layer used to connect 2x4 bricks together. Like "6 plates / 2 bricks" for the first one, "2 plates" for second one and "2.5" plates for last.
    – Alex
    Commented Apr 24, 2020 at 14:40
2

You can wedge a 1xN plate between studs (at a 90 degree angle) to the "normal" orientation. Repeat a second time, and now 2 bricks are stud-to-stud.

Your Answer

By clicking “Post Your Answer”, you agree to our terms of service and acknowledge you have read our privacy policy.

Not the answer you're looking for? Browse other questions tagged or ask your own question.